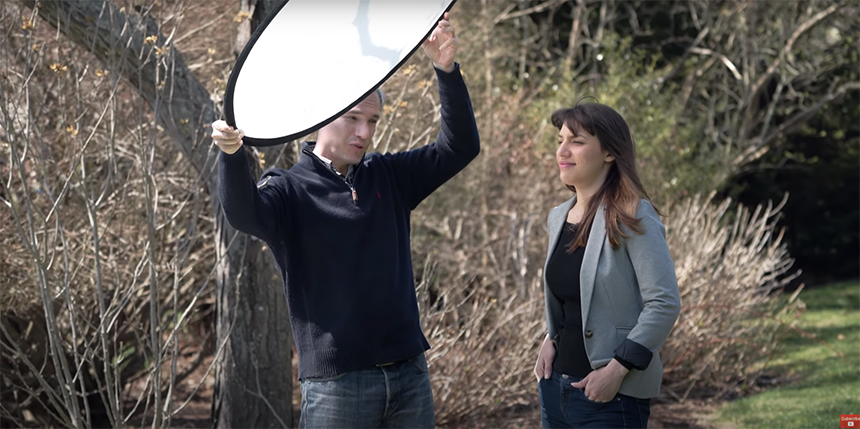
When a photographer works on location outdoors, they still need to control the light to produce the best end result, just like in the studio. One method is to use a diffuser panel to spread the natural light and produce a more pleasing, softer lighting effect, removing harsh highlights and hard shadows.
Screengrab from this youtube video: https://youtu.be/qoQ4_W3ogFg by Tony & Chelsea Northrup
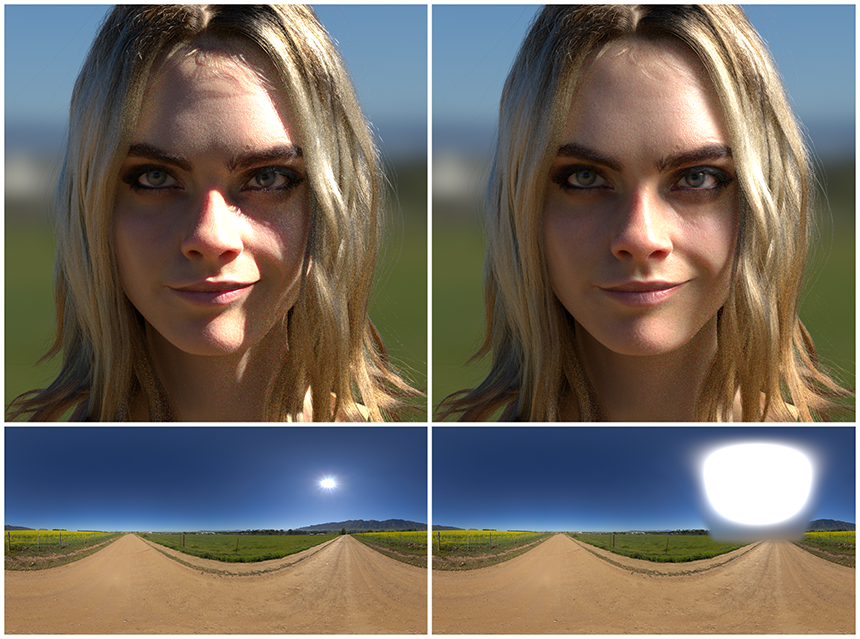
Using the Diffusion filter in HDR Light Studio. We can now mimic this effect.
The portrait render, below, on the left has very hard lighting coming from the small and bright sun. The sun area of the HDRI map has been diffused to light the render on the right. This produces a far more pleasing softer lighting effect. The brightness of the sun has been spread out over a larger area, but the amount of light energy has been conserved.
3D scene kindly provided by: Marlon R. Nunez
Here is the HDR Light Studio project setup to achieve this.
The root Light List is to the left, and the contents of the Composite Lights is expanded towards the right.
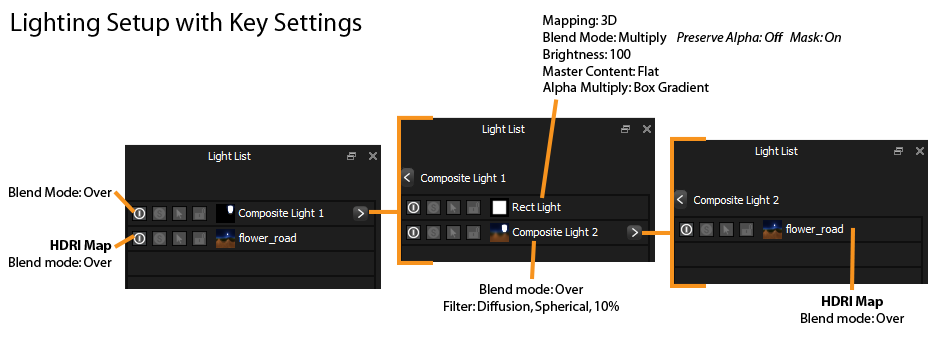
We created Composite Light 1, so that the Rect Light can mask Composite Light 2. We made Composite Light 2 in order to use the Blur filter on the HDRI map. Filters can only be applied to composites.